How do I move exported files to my local computer in GrowPoint Cloud?
While this seems daunting, it is a simple setup process.
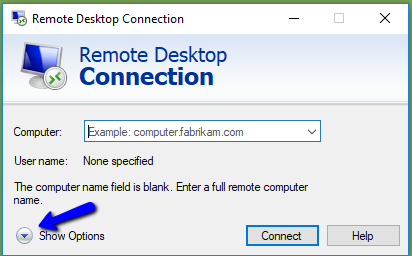
Set your Remote Desktop Protocol/Connection (RDP) to share a drive or device of your choosing and decide how you want to move the files to your local computer. Opening the RDP Window will give you several options, you will choose the Show Options.
This expands the window allowing you to select and adjust how your connection to GrowPoint Cloud works. The option you are looking to see is the Local Resources tab and the More button at the bottom of the screen.
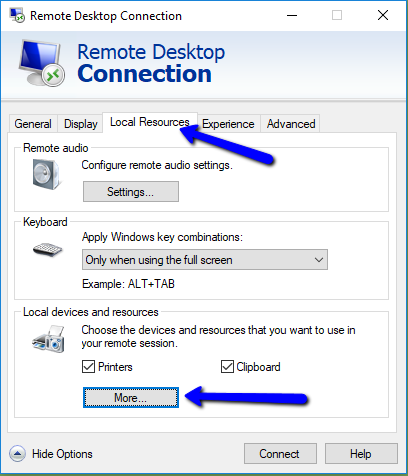
The More button allows you to share local computer drives, network drives, and future plug and play devices i.e. thumb drives. Before sharing any drives make sure the customer has verified with their IT Person. I have shared my C: Drive, E: Drive (USB Attached SSD Drive) and Z: Drive (Local Area Network Drive).
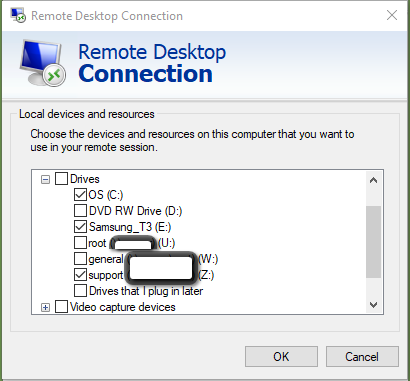
Now select the OK button and the Save button on the General Tab. You’re ready to connect.
On connection to GrowPoint Cloud, any drive you have selected to will appear in the MS Windows File Explorer screen
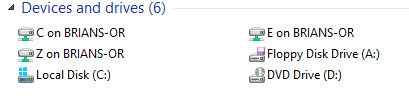
You can now open multiple File Explorer windows for the Local GrowPoint Cloud C: Drive and your Shared Drives. It is a simple as Copying (Ctrl – C) and Pasting (Ctrl – V) the files to move them between drives. Within GrowPoint you can save directly to your shared drives.